flutter fcm push
flutter에서 push를 보내려면
2가지 라이브러리를 써야한다.
https://pub.dev/packages/flutter_local_notifications
https://pub.dev/packages/firebase_messaging
실질적으로 창을 띄우는역활을 하는 flutter_local_notifications와
데이터를 받는부분의 firebase_messaging
flutter_local_notifications의 android 셋팅
flutter-android-build.gradle에
com.android.tools.build.gradle은 최소 4.2.2를 써야하고 (이보다 높으면 놔둬라)
buildscript {
   ...

    dependencies {
        classpath 'com.android.tools.build:gradle:4.2.2'
        ...
    }
flutter-android-app-src-build.gradle에 들어가서 각각 부분에 아래정보들을 복붙한다.
android {
  compileSdkVersion 33 // 최소 33이상이여야한다
  defaultConfig {
    multiDexEnabled true
  }

  compileOptions {
    // Flag to enable support for the new language APIs
    coreLibraryDesugaringEnabled true
    // Sets Java compatibility to Java 8
    sourceCompatibility JavaVersion.VERSION_1_8
    targetCompatibility JavaVersion.VERSION_1_8
  }
}

dependencies {
  implementation 'androidx.window:window:1.0.0'
  implementation 'androidx.window:window-java:1.0.0'
  coreLibraryDesugaring 'com.android.tools:desugar_jdk_libs:1.1.5'
}
flutter-android-app-src-main-AndroidManifest.xml 에 들어가서
MainActivity에다 아래정보 추가 showWhenLocked,trunScreenOn true 추가
<activity
    android:name=".MainActivity"
    android:showWhenLocked="true"
    android:turnScreenOn="true">
flutter_local_notifications의 ios셋팅
xcode-Runner-Runner-AppDelegate에 들어가서 값추가
if #available(iOS 10.0, *) {
  UNUserNotificationCenter.current().delegate = self as? UNUserNotificationCenterDelegate
}
예시)
import UIKit
import Flutter
import flutter_local_notifications

@UIApplicationMain
@objc class AppDelegate: FlutterAppDelegate {

  override func application(
    _ application: UIApplication,
    didFinishLaunchingWithOptions launchOptions: [UIApplication.LaunchOptionsKey: Any]?
  ) -> Bool {
    // This is required to make any communication available in the action isolate.
    FlutterLocalNotificationsPlugin.setPluginRegistrantCallback { (registry) in
        GeneratedPluginRegistrant.register(with: registry)
    }

    if #available(iOS 10.0, *) {
      UNUserNotificationCenter.current().delegate = self as UNUserNotificationCenterDelegate
    }

    GeneratedPluginRegistrant.register(with: self)
    return super.application(application, didFinishLaunchingWithOptions: launchOptions)
  }
}
fcm의 ios셋팅
ios개발자 - certificates,Identifiers&Profiles에 들어가서 Identifiers- 본인프로젝트 클릭
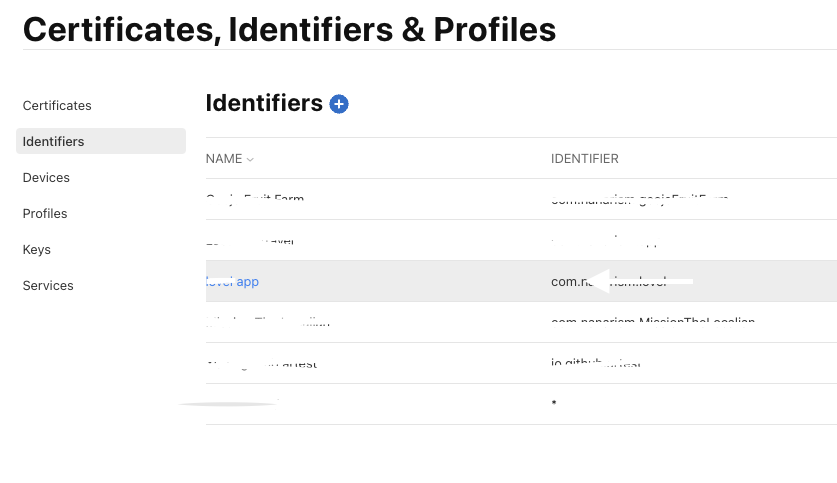
쭉내리다보면 Push Notifications 발견하면 클릭후 저장한다

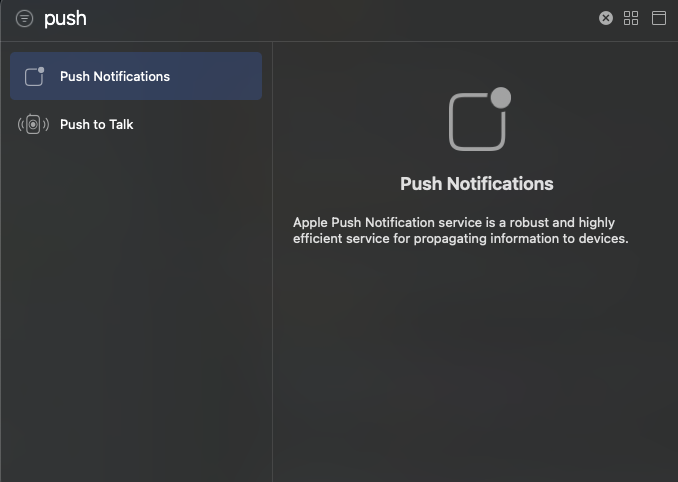
xcode로 와서Runner-Signing& Capabilities에 Capability버튼 클릭
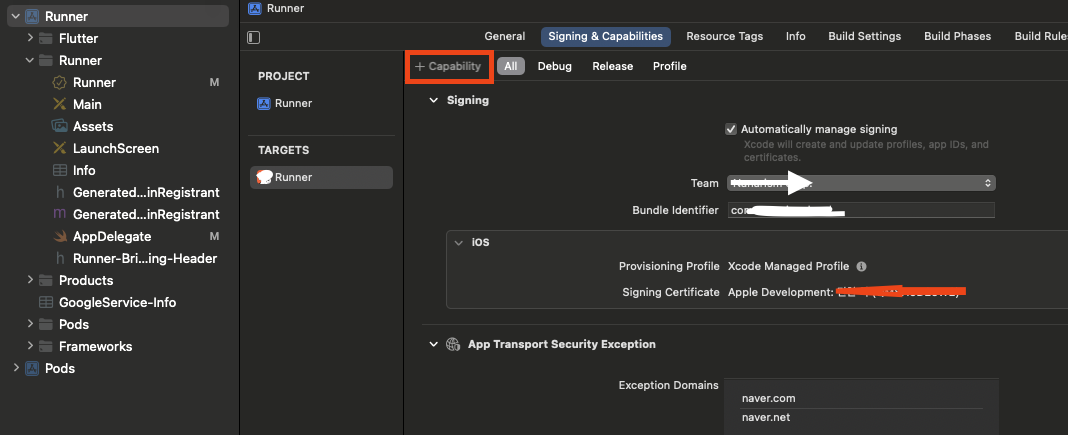
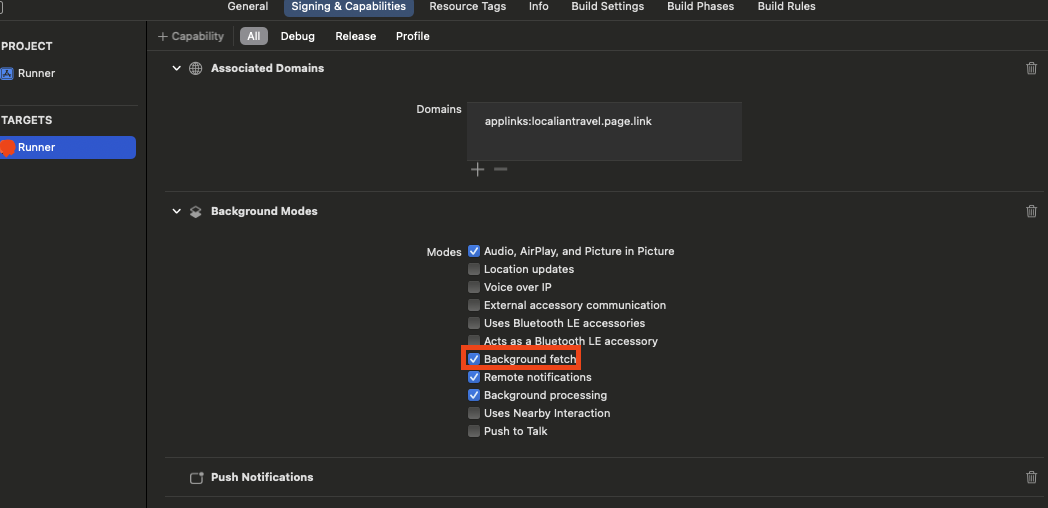
push와 back ground modes를 검색하여 더블클릭해서 추가한다.
Background fetch에 체크하면된다
그리고
xcode-Runner-runner-info에서 FirebaseAppDelegateProxyEnabled No로 추가해야 로그에 에러가안뜬다

이제 apn 설정
ios개발자 - certificates,Identifiers&Profiles에 keys에 들어가서 +를 누른다

Apple Push Notifications service (APNs)를 클릭후 원하는이름 지정 후 다음
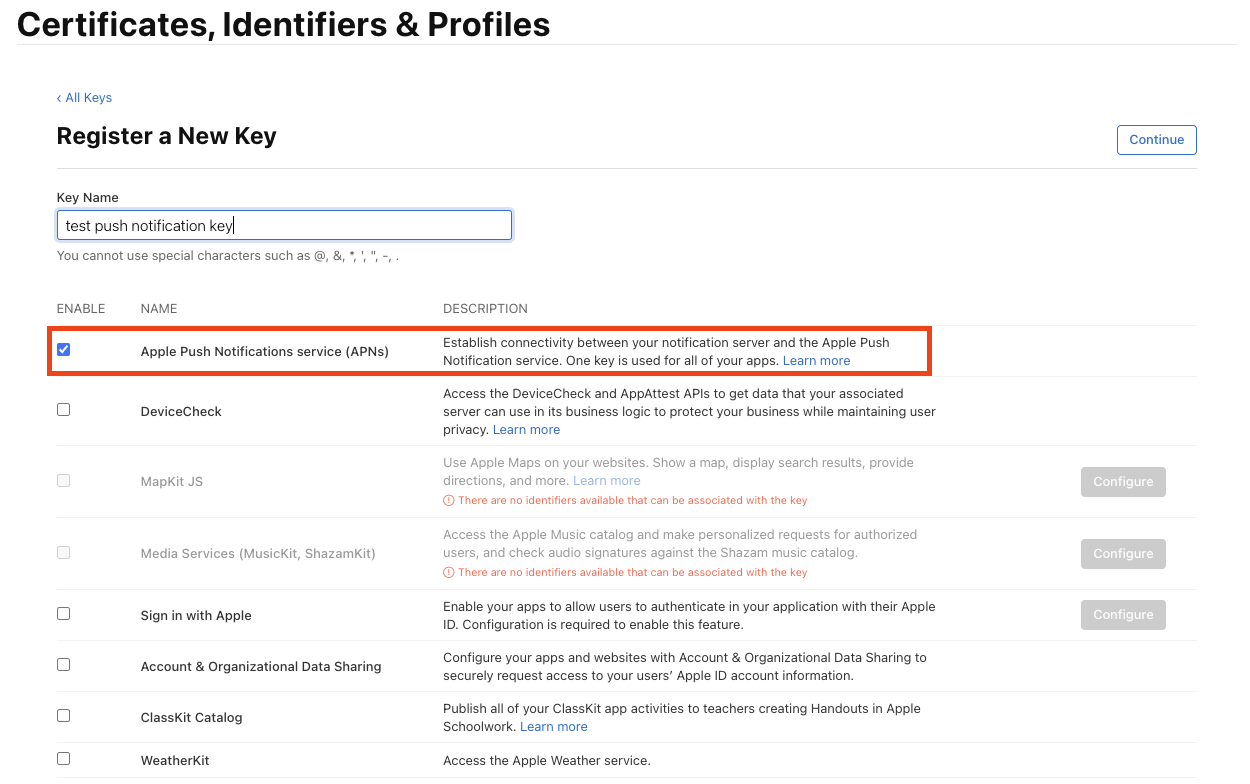
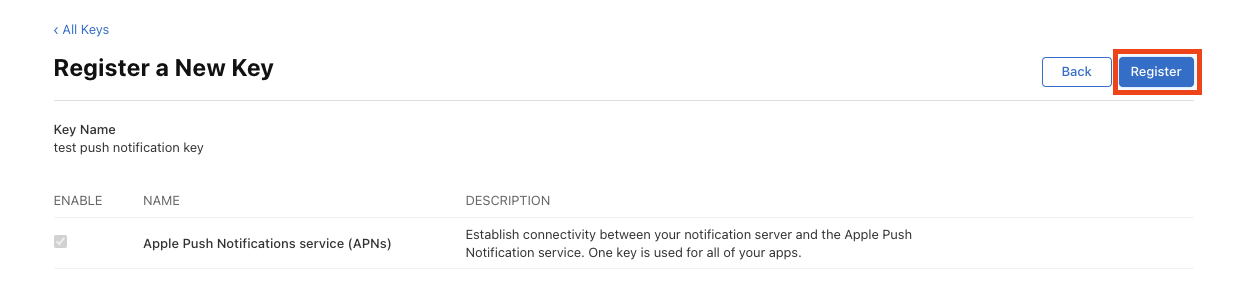
건들것없다 생성
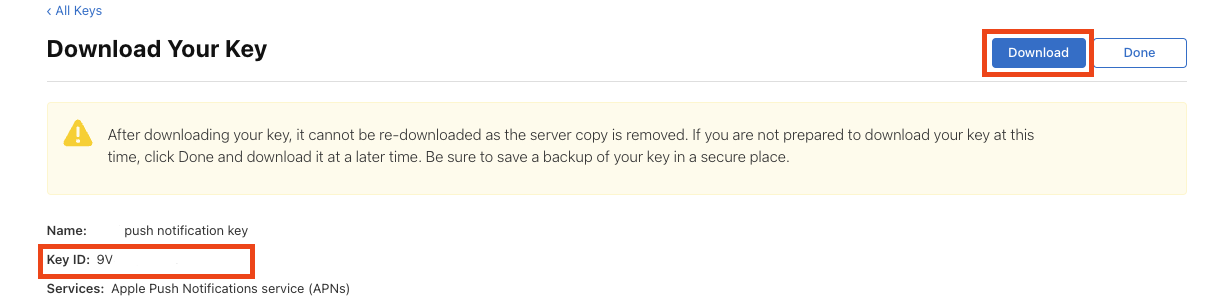
이제 만든키를 다운받고 key id를 복사해놓는다
firebase프로젝트 설정 - 클라우드 메시징 - apple 앱 구성에 apn 인증서 업로드 클릭
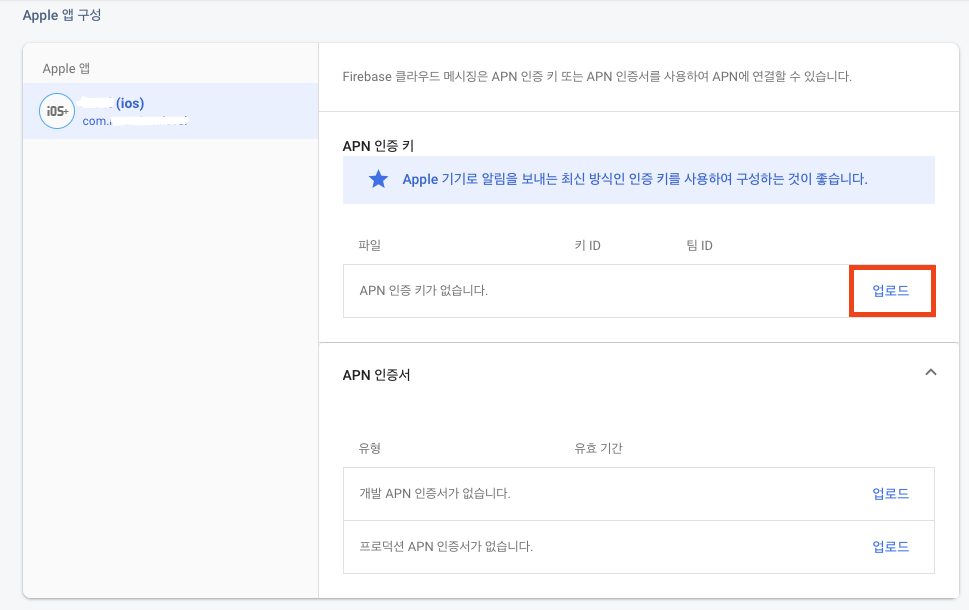
아래와같이 찾아보기 클릭 후 아까 다운받은 인증서 클릭해서 넣고 복사한키도 같이 붙여넣는다.
팀id는 firebase에 미리넣어둔사람은 바로뜨는데 안넣어놔서 안떴다면
ios개발자 - certificates,Identifiers&Profiles에 들어가서 Identifiers- 본인프로젝트 클릭 들어가면 App ID Prefix라고 뜨는데 이거다
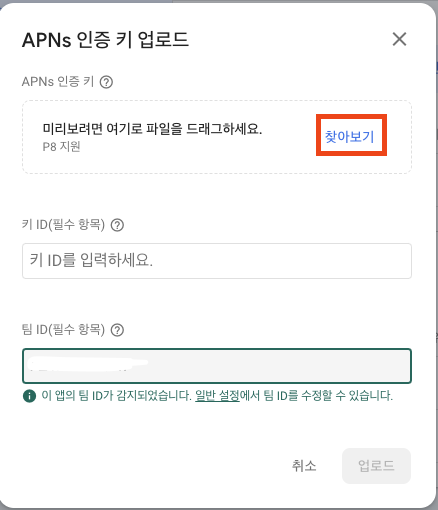
업로드하면 아래와같이 들어가져있다

앱에서 푸쉬를 받는 상황은
앱켜진상태 background,foreground
앱이 꺼진상태
flutter-main안에 추가
  //앱이 꺼졌을때 //앱 백그라운드
  FirebaseMessaging.onBackgroundMessage(_firebaseMessagingBackgroundHandler);

  //앱 포그라운드
  FirebaseMessaging.onMessage.listen(
    showFlutterNotification,
  );

  //앱 백그라운드에서 푸쉬클릭시
  FirebaseMessaging.onMessageOpenedApp.listen((RemoteMessage message) {
    Get.toNamed(message.data.keys.first,
        arguments: int.parse(message.data.values.first));
  });

  //앱꺼진상태에서 푸시클릭시 이동
  FirebaseMessaging.instance.getInitialMessage().then((RemoteMessage? message) {
    if (message != null) {
      Get.toNamed(message.data.keys.first,
          arguments: int.parse(message.data.values.first));
    }
  });
  if (!kIsWeb) {
    await setupFlutterNotifications();
  }
background 셋팅부분
  //앱이 꺼졌을때 //앱 백그라운드
FirebaseMessaging.onBackgroundMessage(_firebaseMessagingBackgroundHandler);@pragma('vm:entry-point')
Future<void> _firebaseMessagingBackgroundHandler(RemoteMessage message) async {
await Firebase.initializeApp(options: DefaultFirebaseOptions.currentPlatform);
await setupFlutterNotifications();
// showFlutterNotification(message);firebase에서 자동으띄워줌(주석지우면 2번뜸)
}background 클릭 이벤트부분
//앱 백그라운드에서 푸쉬클릭시
FirebaseMessaging.onMessageOpenedApp.listen((RemoteMessage message) {
  Get.toNamed(message.data.keys.first,
      arguments: int.parse(message.data.values.first));
});
foreground셋팅부분
FirebaseMessaging.onMessage.listen(
  showFlutterNotification,
);
void showFlutterNotification(RemoteMessage message) {
RemoteNotification? notification = message.notification;
AndroidNotification? android = message.notification?.android;
if (notification != null && android != null && !kIsWeb) {
flutterLocalNotificationsPlugin.show(
notification.hashCode,
notification.title,
notification.body,
payload: jsonEncode(message.data),//필수
NotificationDetails(
android: AndroidNotificationDetails(
channel.id,
channel.name,
channelDescription: channel.description,
// TODO add a proper drawable resource to android, for now using
// one that already exists in example app.
icon: '@mipmap/launcher_icon',
),
),
);
}
}foreground 클릭 이벤트부분
//setupFlutterNotifications안에 onDidReceiveNotificationResponse 이부분이다

  flutterLocalNotificationsPlugin.initialize(
    initializationSettings,
    onDidReceiveBackgroundNotificationResponse: onSelectNotification,
    onDidReceiveNotificationResponse: onSelectNotification,
  );
onSelectNotification(NotificationResponse details) async {
if (details.payload != null) {
Map<String, dynamic> data = jsonDecode(details.payload ?? "");
Get.toNamed(data.keys.first, arguments: int.parse(data.values.first));
}
}
앱꺼졌을시
셋팅부분(백그라운드와 중복)
  //앱이 꺼졌을때 //앱 백그라운드
FirebaseMessaging.onBackgroundMessage(_firebaseMessagingBackgroundHandler);@pragma('vm:entry-point')
Future<void> _firebaseMessagingBackgroundHandler(RemoteMessage message) async {
await Firebase.initializeApp(options: DefaultFirebaseOptions.currentPlatform);
await setupFlutterNotifications();
// showFlutterNotification(message);firebase에서 자동으띄워줌(주석지우면 2번뜸)
}앱꺼졌을시
클릭 이벤트부분
//앱꺼진상태에서 푸시클릭시 이동
FirebaseMessaging.instance.getInitialMessage().then((RemoteMessage? message) {
  if (message != null) {
    Get.toNamed(message.data.keys.first,
        arguments: int.parse(message.data.values.first));
  }
});
기본셋팅부분
Future<void> setupFlutterNotifications() async {
  if (isFlutterLocalNotificationsInitialized) {
    return;
  }
  channel = const AndroidNotificationChannel(
    'high_importance_channel', // id
    'High Importance Notifications', // title
    description: 'This channel is used for important notifications.',
    // description
    importance: Importance.high,
  );

  var initializationSettingsAndroid =
      const AndroidInitializationSettings('@mipmap/launcher_icon');

  var initializationSettingsIos = const DarwinInitializationSettings();

  var initializationSettings = InitializationSettings(
    android: initializationSettingsAndroid,
    iOS: initializationSettingsIos,
  );

  flutterLocalNotificationsPlugin = FlutterLocalNotificationsPlugin();

  flutterLocalNotificationsPlugin.initialize(
    initializationSettings,
    onDidReceiveBackgroundNotificationResponse: onSelectNotification,
    onDidReceiveNotificationResponse: onSelectNotification,
  );

  /// Create an Android Notification Channel.
  ///
  /// We use this channel in the `AndroidManifest.xml` file to override the
  /// default FCM channel to enable heads up notifications.
  await flutterLocalNotificationsPlugin
      .resolvePlatformSpecificImplementation<
          AndroidFlutterLocalNotificationsPlugin>()
      ?.createNotificationChannel(channel);

  /// Update the iOS foreground notification presentation options to allow
  /// heads up notifications.
  await FirebaseMessaging.instance.setForegroundNotificationPresentationOptions(
    alert: true,
    badge: true,
    sound: true,
  );
  isFlutterLocalNotificationsInitialized = true;
}
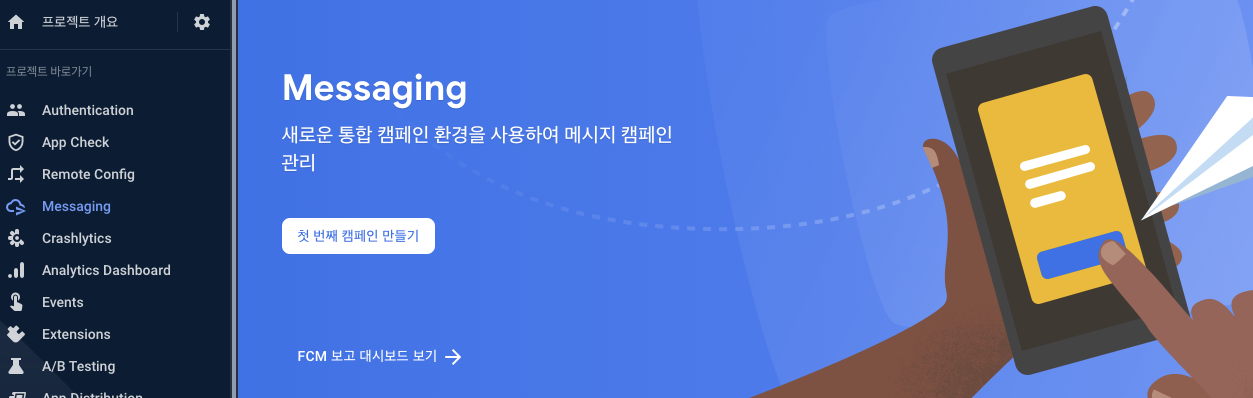
이제 파이어베이스 콘솔-Messaging으로 가서 첫 번째 캠페인 만들기 클릭
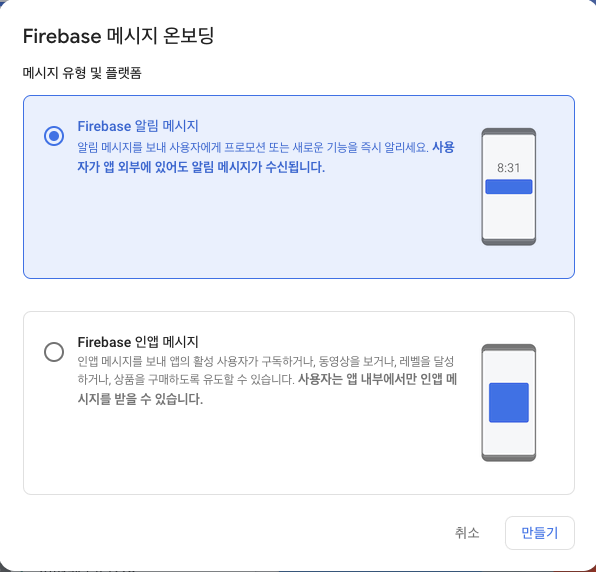
첫번째꺼 클릭 후 만들기
푸쉬로 보낼 제목과 텍스트를 입력
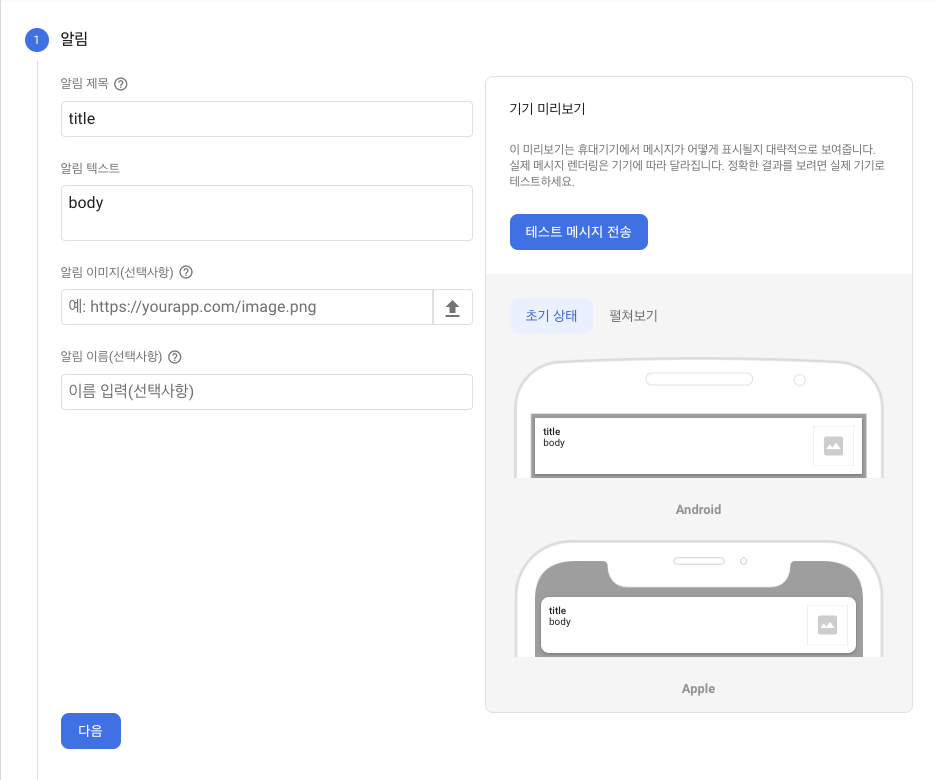
타겟에서 안드로이드와 ios 원하는것 선택
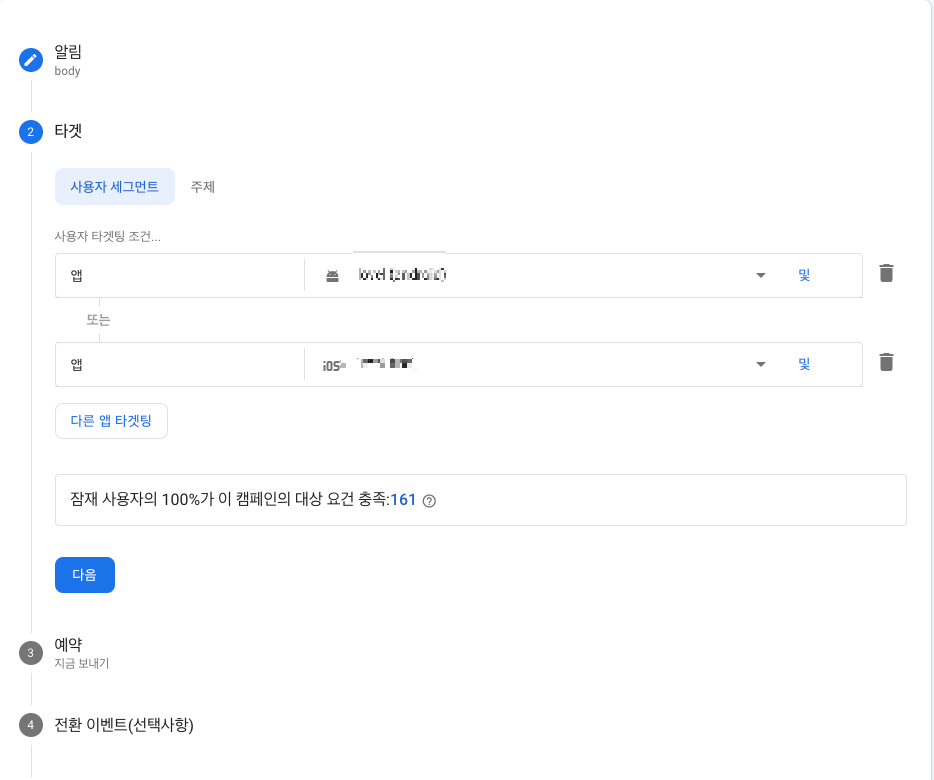
예약하고싶으면 설정하고
이동하고싶은 경로가 있으면 추가옵션에 맞춤데이터에 값을 넣는다.
다 설정후 절대 검토를 누르면 안된다!!! 실제로 날라감

검토 대신 다시 알림으로 돌아가서 테스트메시지 전송을 눌르면 된다
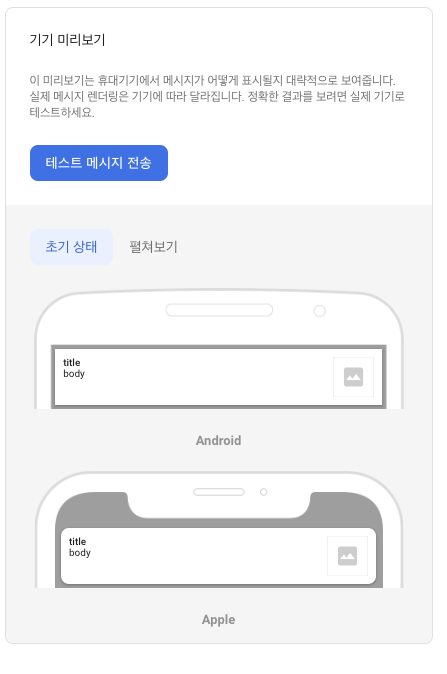
누르면 아래와같이 뜨는데 FCM 등록 토큰 추가 이부분에 클릭해서 토큰을 추가해야한다
앱의 토큰 보는방법은
var token = await FirebaseMessaging.instance.getToken();token값을 아래에 넣으면 된다
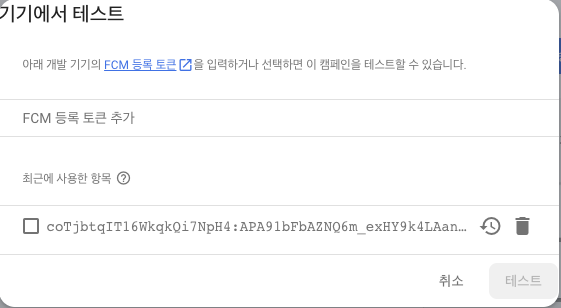
그리고 체크 후 테스트 누르면 푸쉬가 매우 잘 날라온다.
테스트할때는 ios는 무조건 실제폰에서 android는 에뮬레이터로 된다 앱이 꺼졌을때 테스트시 android는 release모드로 빌드해서 테스트해야한다